How to Restore Your Full Website to a Previous Date

Restore Your Full Website to a Previous Date Using JetBacakup
JetBackup's self service functionality allows end users to restore an account within seconds. Not all Web Hosting companies offer this restoration method, Sino Soft Web Hosting allows one to restore all their cpanel files in a previous state of up to 3 weeks back.
In order for you to this, log in to your Cpanel then search for JetBack and click on it. On the below button will take you through what each function does and how to do a successful restoration or dowloading a back from a previouse date
1. Restore and Download
In this section, you can view, restore and download your Account backups or choose to restore specific Backup Items.
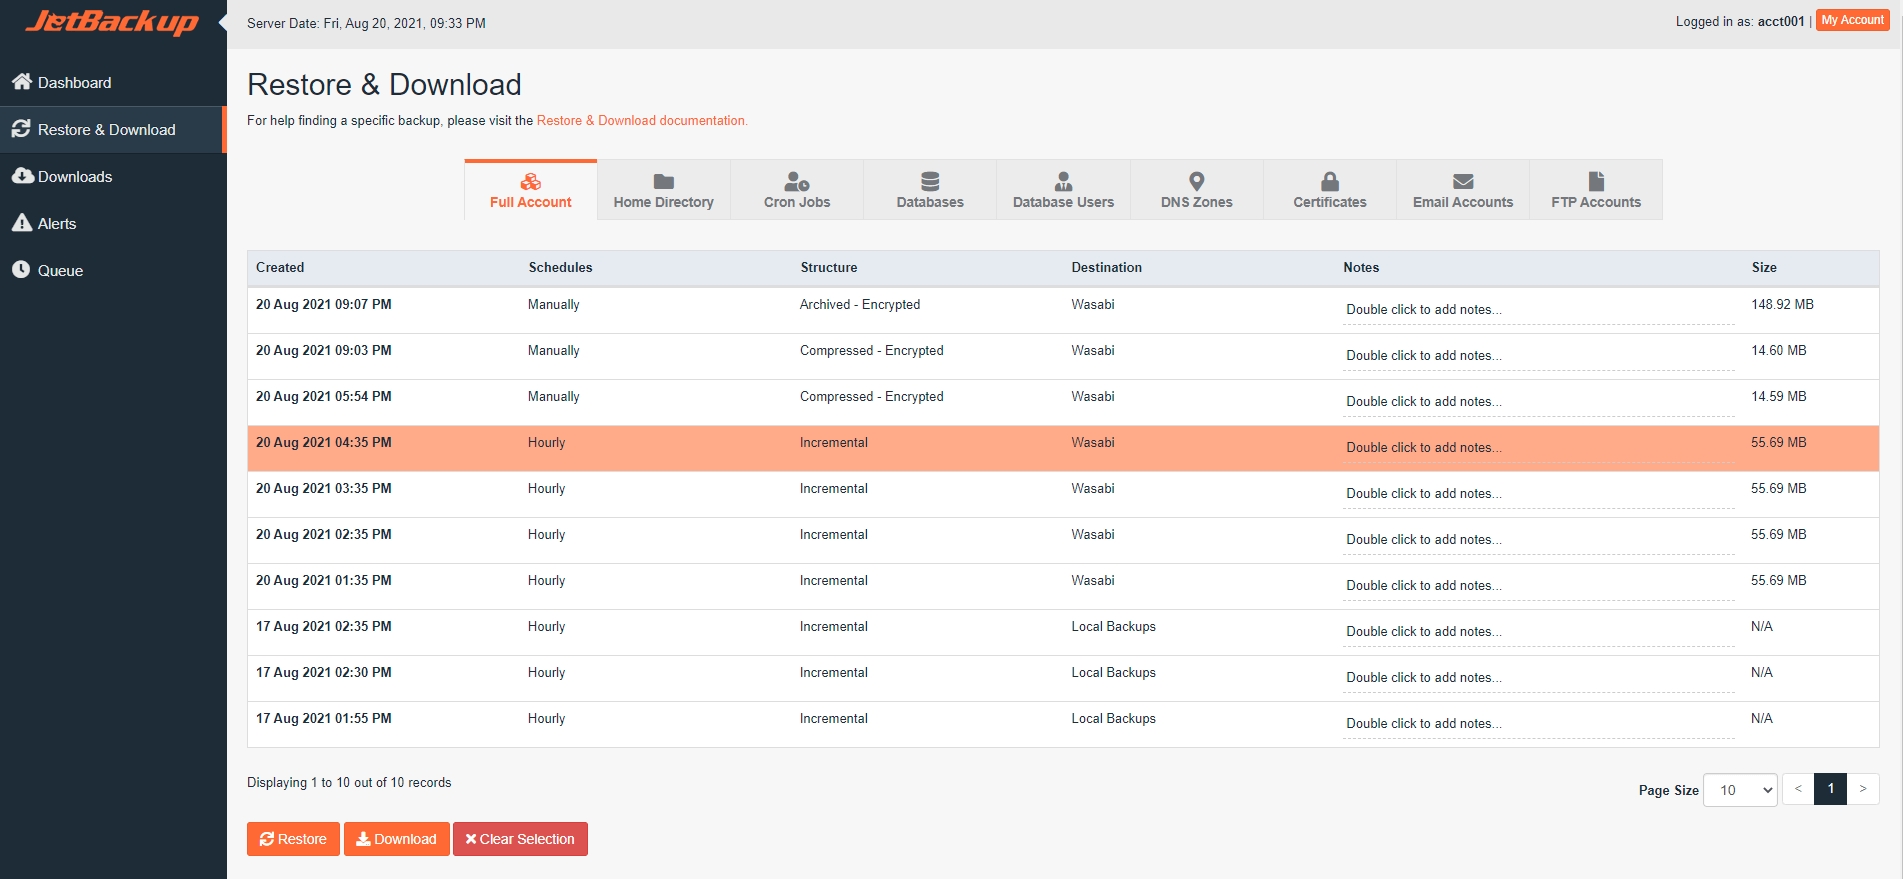
Items to Restore/Download
Each Backup Item has a specific tab for Restore or Download. The Full Account tab, by default, will include all Backup Items if available in your backup.
- Full Account *
- Home Directory Files
- Databases **
- Database Users **
- Email Accounts
- FTP Accounts
- Cron Jobs
- DNS Zones
- SSL Certificates
* The Full Account restore will only restore the Backup Items the user has permission to manage. If permission to some backup items is not granted, they will not be included on the Full Backup Restore.
* NOTE: When selecting a Database for restore or download without selecting Database Users, ONLY the selected database or databases will be included. If you're performing a "Databases" restore or download from the Databases (DB) Tab, please ensure the proper Database Users (DB users) assigned to that Database are also selected BEFORE proceeding with the restore or download.
Restore and Download Buttons
Restore - Restore selected backups and add them to the Queue. On this step, you can remove backup items from the Restore. If you'd like to remove a backup item from the Restore, click "Remove items" under the category to remove it from the Restore.
Download - Download selected backups and add them to the Queue. On this step, you can remove backup items from the Download. If you'd like to remove a backup item from the download, click "Remove items" under the category to remove it from the Download.
Both options allow you to customize the items you'd like to restore or download prior to queueing it on your server.
2. Restore Selected Items
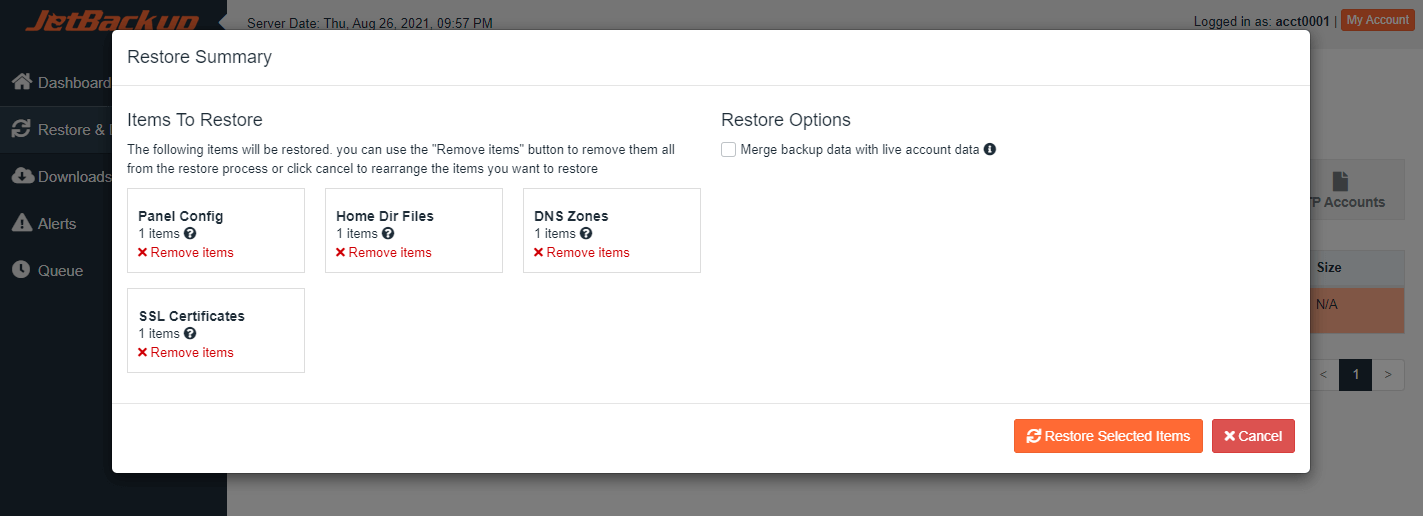
Restore Options:
The "Restore Options" category will only show when restoring from the User Panel.
Merge live account data with backup data
This option will merge your backup data with the existing data on your account. Live data takes precedence over restore data.
Restore Conditions:
Conditions specified under the Restore Settings that would need to be accepted in order to proceed with the restoration. Restore conditions are created by your hosting provider. You will only need to acknowledge them if this section is displayed.
Restore Summary
Restore Selected Items
Now you're ready to restore! Clicking the "Restore Selected Items" button will queue the restore on your server. The restore will be added to the Queue as Processing, and the status will automatically update when it's Completed.
3. Download Selected Items
Clicking the "Download Selected Items" will add the selected items to the queue for download. The download will be available under Downloads after it has been completed. You can go to "Downloads" using the JetBackup menu and download the file.
Files/Directories
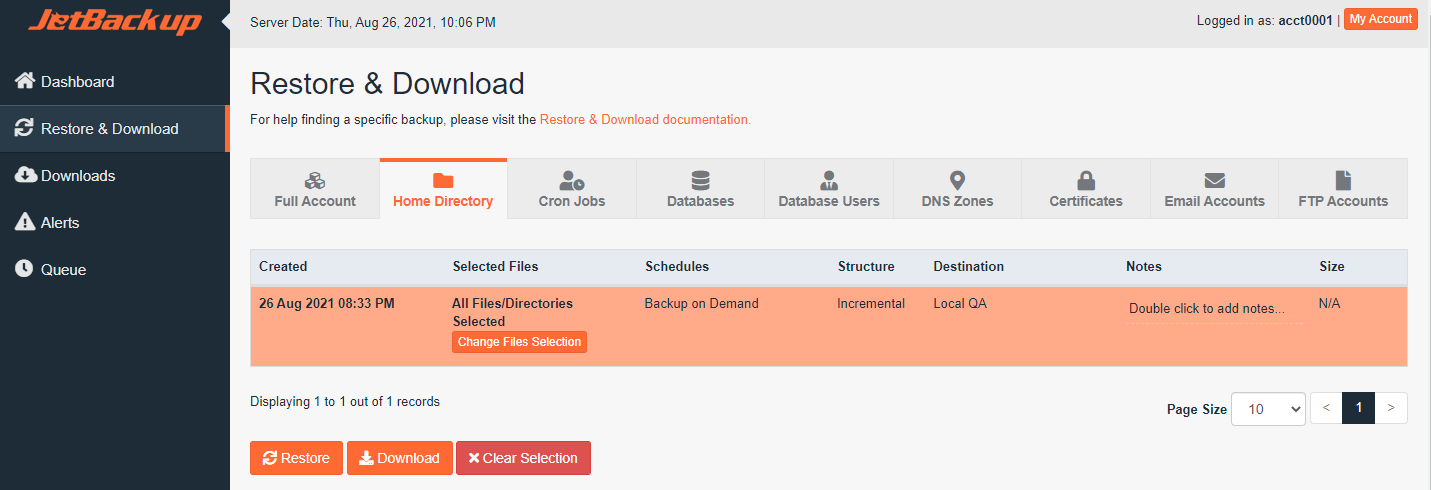
You can choose files or directories to Restore/Download on Home Directory Backup Items only.
From the "Home Directory" tab, you can change the files selected by clicking "Change Files Selection" on the selected Incremental Backup and navigating to your specific file in the file browser.
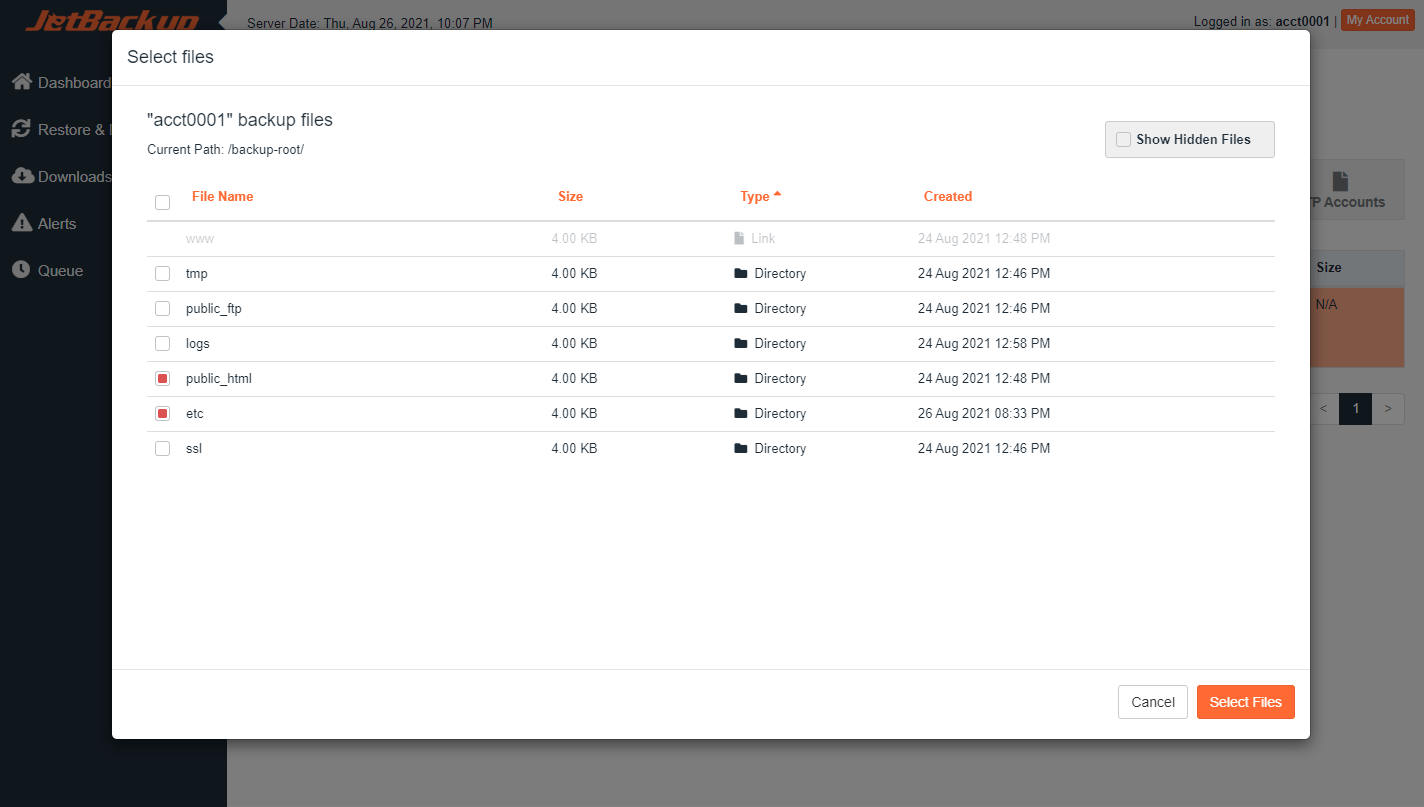
Restore & Download Select Files
After checking the box to the left or any files/directories, make sure to click "Select Files" at the bottom to save your selection.
Then, continue by clicking the "Restore" or "Download" buttons at the bottom of the page.
Please note that you can only select files/folders to restore and download on an Incremental Backup Type. Archived/Compressed Home Directory Backups do NOT allow File Selection prior to Restore and Download.
Also Get protection against viruses, hackers and even your own code accidentally breaking your site with CodeGuard Website Backup to help easily restore you website.
If this was of help dont forget to hit a thumbs up to help someone else. God bless you in Christ Jesus!


