How to Cancel Web Hosting Services from My Client Area

To cancel your web hosting via cPanel yourself, start by backing up all your data, including website files (using File Manager or FTP), databases (via phpMyAdmin), and emails. Log into your hosting provider’s billing portal to disable auto-renewal for your plan, as cancellation typically cannot be done directly through cPanel.
If desired, delete your website files from the public_html folder and remove databases through the MySQL Databases section in cPanel, but ensure you have backups since this is irreversible. Update your DNS records in the DNS Zone Editor to point your domain to a new host or park it if you plan to use the domain elsewhere.
Finally, submit a cancellation request through your hosting provider’s dashboard, follow their prompts, and verify the cancellation via confirmation email to ensure the account is fully deactivated and billing has stopped.
Table of Contents
1. How to Cancel Web Hosting in WHMCS: A Step-by-Step Guide
- Log into the Client Area
- Find the Service to Cancel
- Request Cancellation
- Provide a Reason
- Auto-Renewal & Domain Settings
- Confirmation
2. Admin Handling of Client Requests
3. Summary
How to Cancel Web Hosting in WHMCS: A Step-by-Step Guide
- Log into the Client Area:
Start by accessing your WHMCS Client Area with your credentials. Once inside, go to the "Services" section.
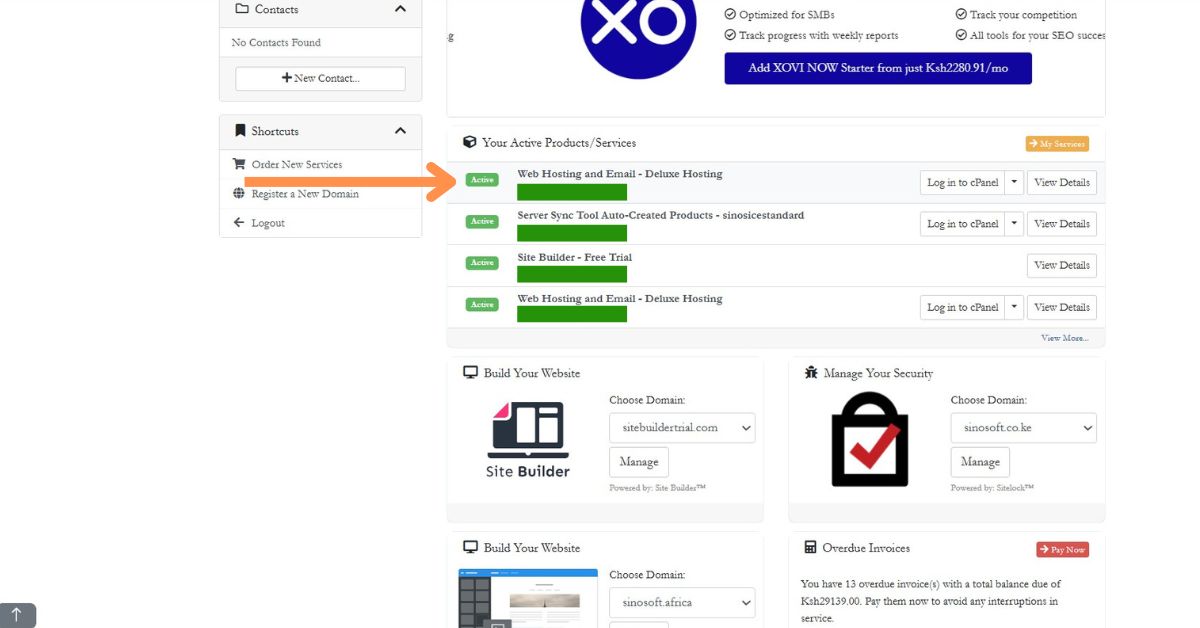
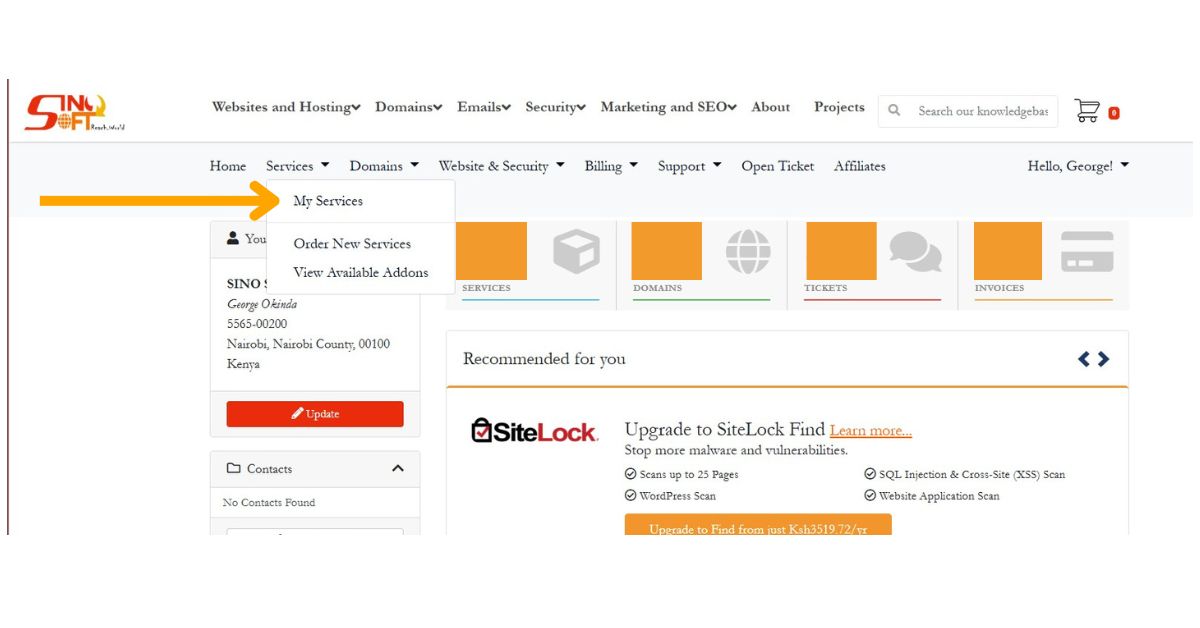 2. Find the Service to Cancel:
Browse through your list of active services and select the hosting service you want to cancel. Click on it to open the details page.
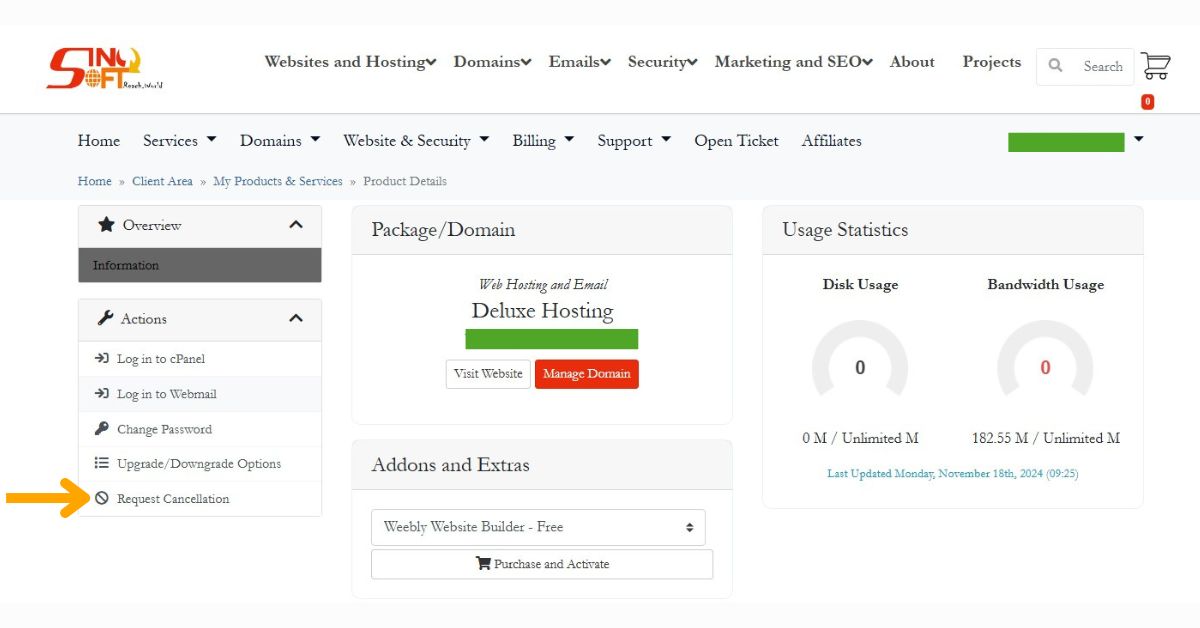
 3. Request Cancellation:
Look for the "Request Cancellation" link. Clicking this will prompt you to choose your preferred cancellation method.
- Instant Termination: If you want to stop the service immediately, select this option. It’ll cancel the service right away the next time the cron job runs.
- End of Current Billing Cycle: Prefer to use the service until the end of the billing period? Choose this option, and it will terminate automatically once the current cycle finishes.
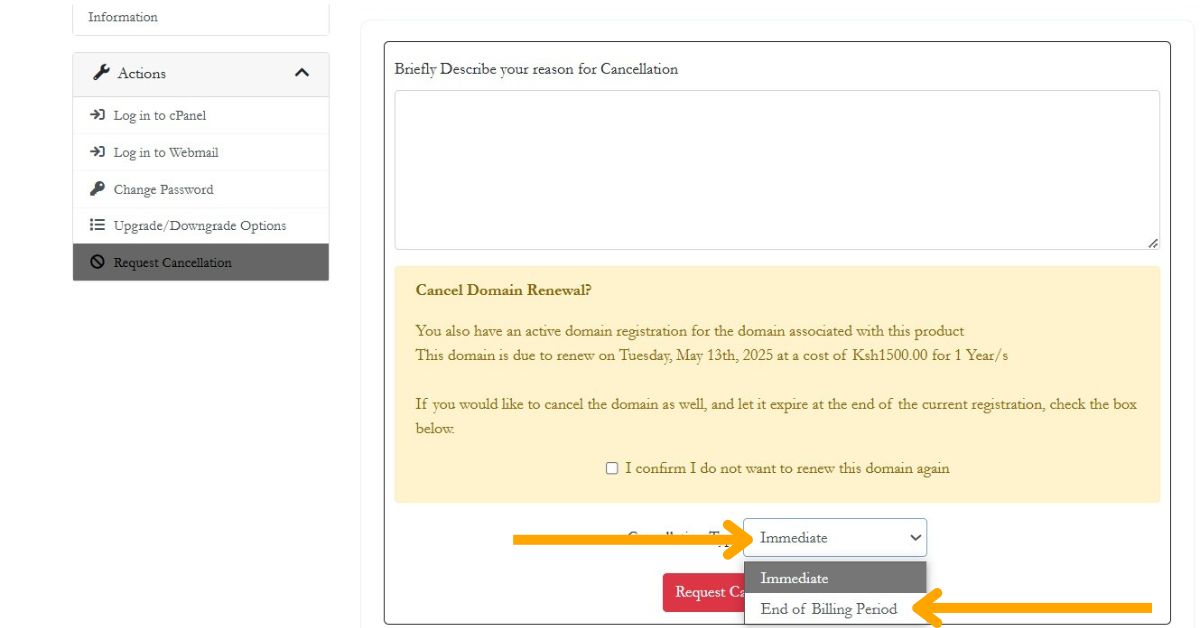
4. Provide a Reason:
You’ll be asked to give a reason for the cancellation. This helps the provider understand your feedback and may offer insights into their service.
- Auto-Renewal & Domain Settings:
If your hosting includes a domain, the system will ask if you want to disable Auto-Renew for it, allowing it to expire. This prevents any future renewals and charges. - Confirmation:
Once confirmed, WHMCS will handle the rest. It cancels the service, removes it from any active invoices, and sends a notification to the admin.
Also Read: How to Add Funds to Your Web Hosting Account
Admin Handling of Client Requests
- If Client Cancellation Requests are enabled, the system will automatically process the cancellation without further admin involvement. However, if not enabled, admins must manually approve the request by visiting Clients > Cancellation Requests and selecting Terminate.
Important Notes
- Addons: When you cancel a hosting service, associated addons are also terminated. There’s no way to cancel them separately without canceling the main service.
- Manual Approval: If the cancellation is not set to auto-process, you’ll need to manually approve or void the cancellation request in the Admin Area.
Summary
In summary, canceling your web hosting via cPanel requires a few essential steps to ensure a smooth process. Begin by backing up your data to safeguard your files, databases, and emails. Disable auto-renewal through your hosting provider’s billing portal, as cancellations typically cannot be handled directly within cPanel.
If necessary, clean up your hosting account by deleting files and databases, but only after confirming backups. Update DNS records if you plan to move your domain to a new host or park it. Finally, submit a cancellation request through the hosting provider’s dashboard and verify its completion to avoid any further charges.
Canceling a hosting service can feel overwhelming, but with proper preparation and attention to detail, you can make the process seamless and ensure your data and domains are managed effectively. Always double-check your backups and confirm cancellation to avoid surprises later.
In case you need help with this, and you want to save time, contact us and we will do it with you.


