How To Create a Website Using Site Builder (FREE trial)

Create a website using site builder - free trial with over 150 templates to choose from is now possible! You could build a website from scratch for absolutely free! Yes you read that right. How you may ask? Our Site Builder, an intuitive tool allows anyone to design a professional-looking website without needing any coding experience. Its drag-and-drop interface that lets users easily place elements (such as text, images, buttons and other such) exactly where they want them on the Webpage.
When you start using Site Builder, you'll have two options: the Free version and the Premium version. The Free version provides essential features for basic website design, while the Premium version offers more advanced tools for customization, giving you greater control over your site's appearance and functionality.
So in this article, we are going to explore how to build a website using the Free trial of the Site Builder, step by step.
Table of Contents
Step 1: Navigating to the Site Builder Landing Page
Step 2: Site Builder Landing Page Layout
Step 3: Enter Your Domain Name
Step 4: Complete the Checkout Process
Step 5: Logging In to the Site Builder Dashboard
Step 6: Accessing the Site Builder from the Client Area
Step 7: Selecting a Site Builder Template
Step 8: Choosing the Fashion Template
Step 1: Navigating to the Site Builder Landing Page
To begin using Site Builder, follow these steps:
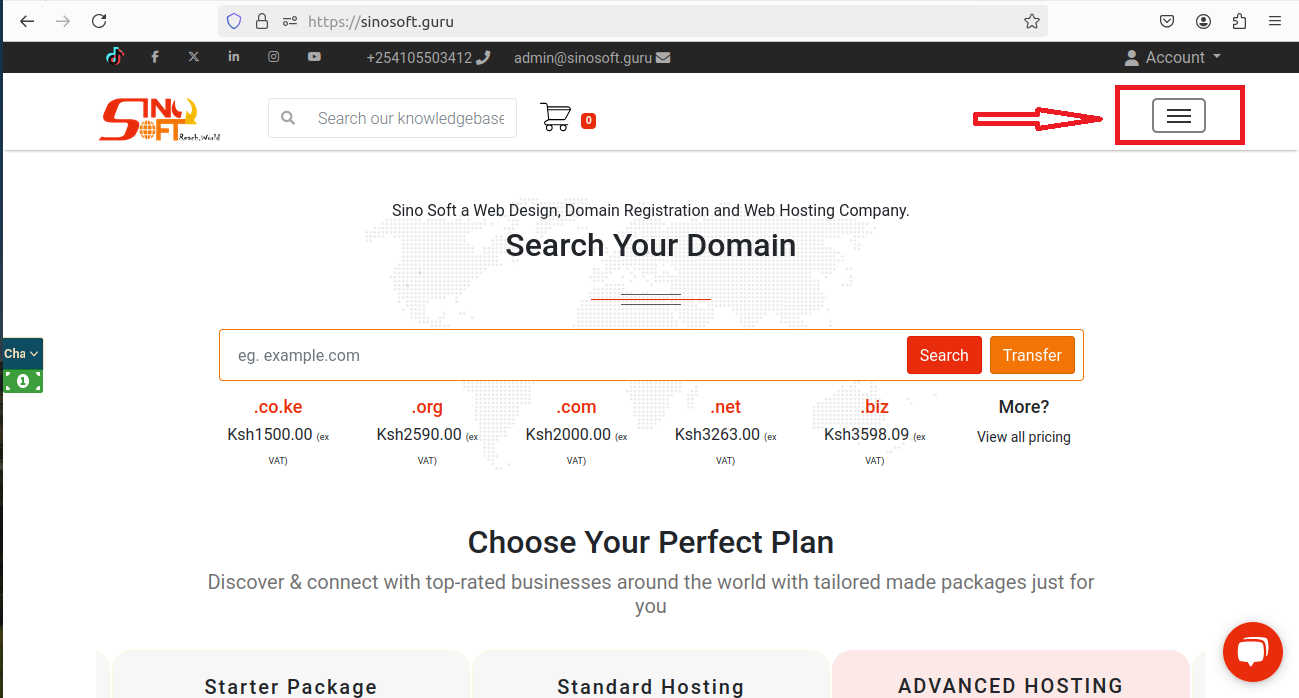
- Open your web browser and go to sinosoft.guru.
- From the homepage, navigate to the Websites and Hosting section.
- Click on Site Builder to access the tool.
This will take you to the Sino Soft Menu
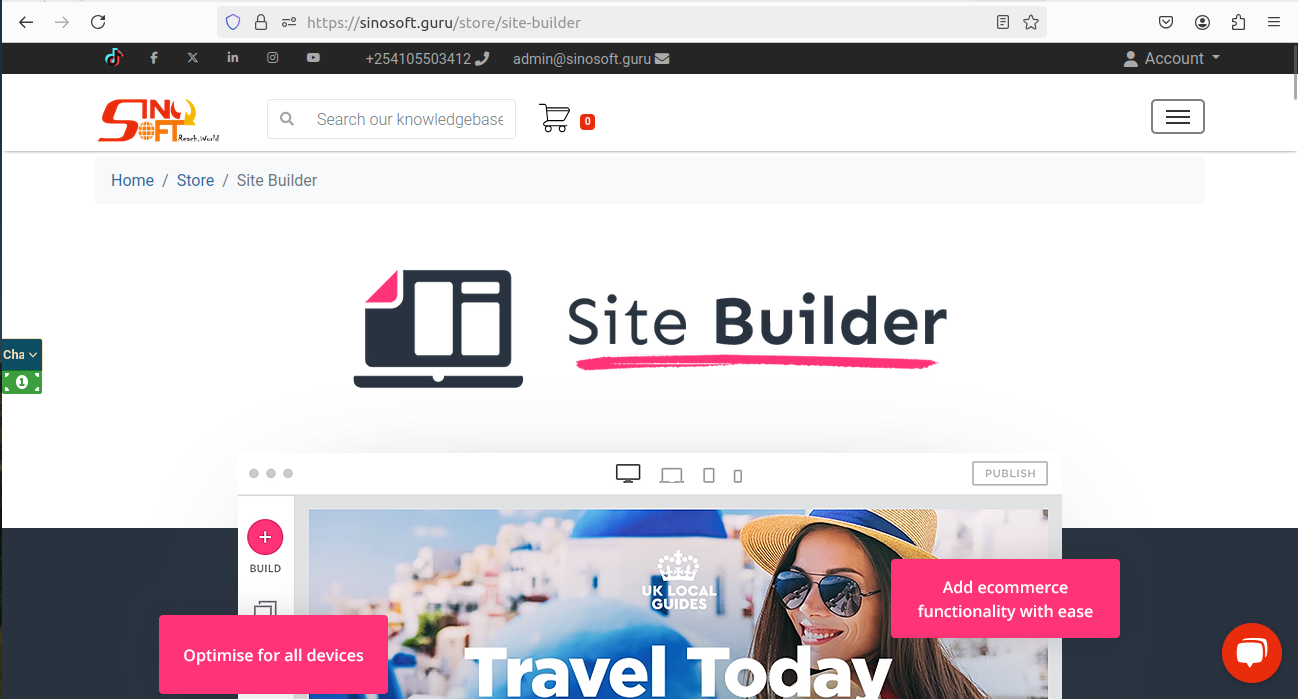
This will take you to the Site Builder Menu

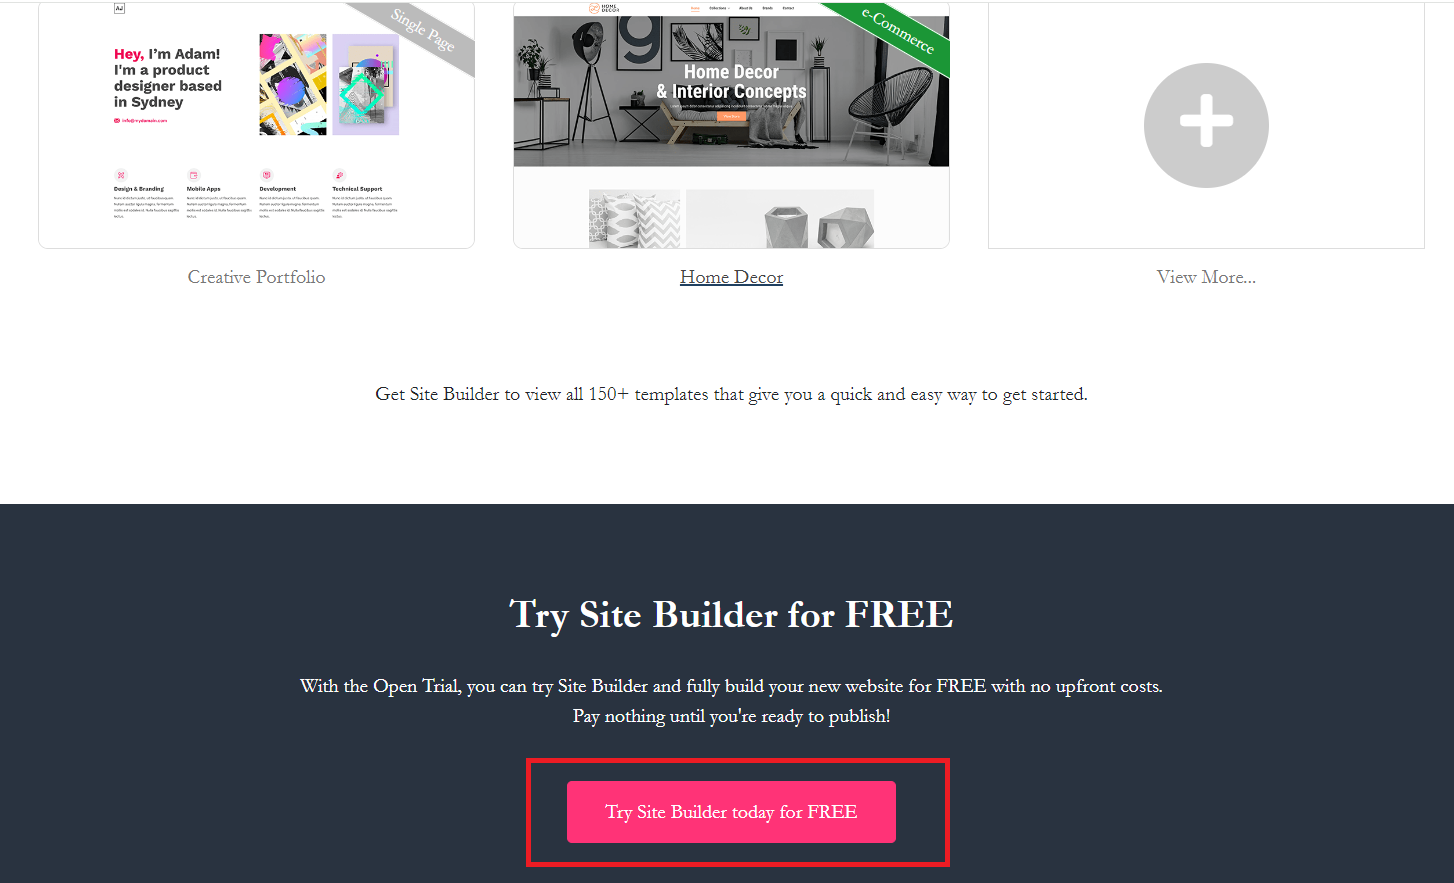
Step 2: Site Builder Landing Page Layout
Now that you're on the Site Builder landing page, follow these steps to begin your free trial:
- Scroll down to the section titled "Try Site Builder Today for FREE."
- Click the button that prompts you to start the free trial.
- You will be redirected to a new page where you'll need to enter the domain name you wish to use for your website.
Step 3: Enter Your Domain Name
On the new page, follow these steps to secure your domain for the free trial:
- Enter the domain name you wish to use in the provided field.
- After entering the domain, ensure that it is marked as Valid, confirming that the domain is available for use.
- Once validated, proceed to the checkout section.
Note: The domain will cost nothing as this is part of the free trial, so you won’t be charged for it during this process.
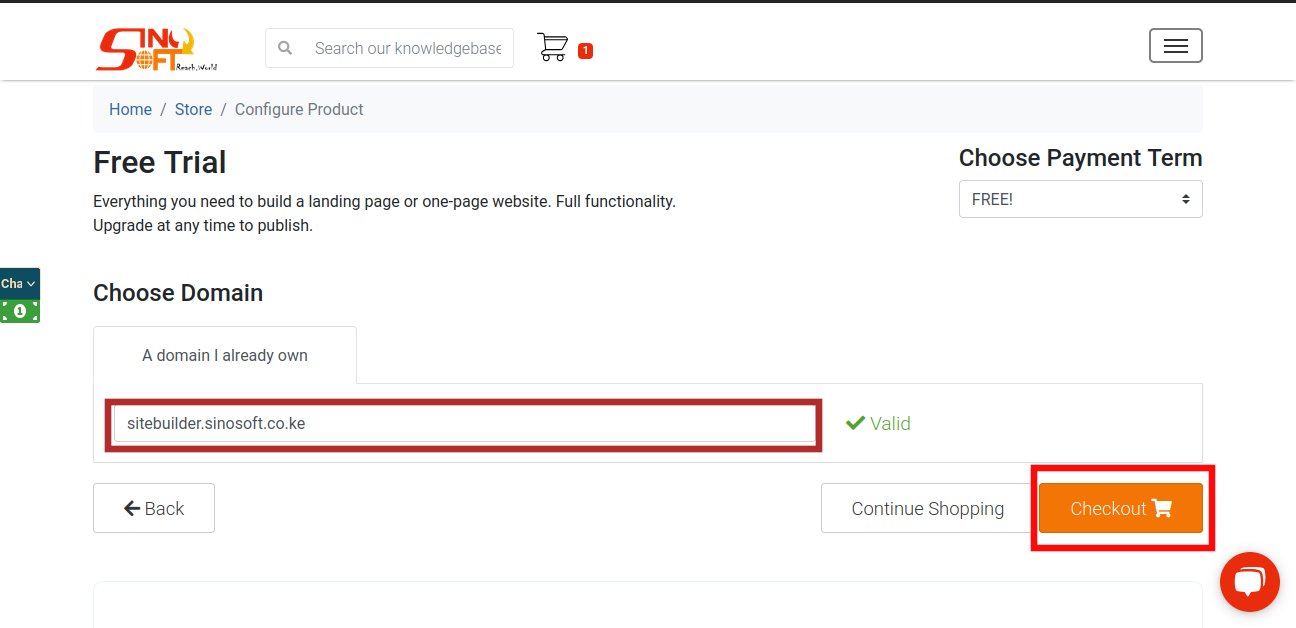
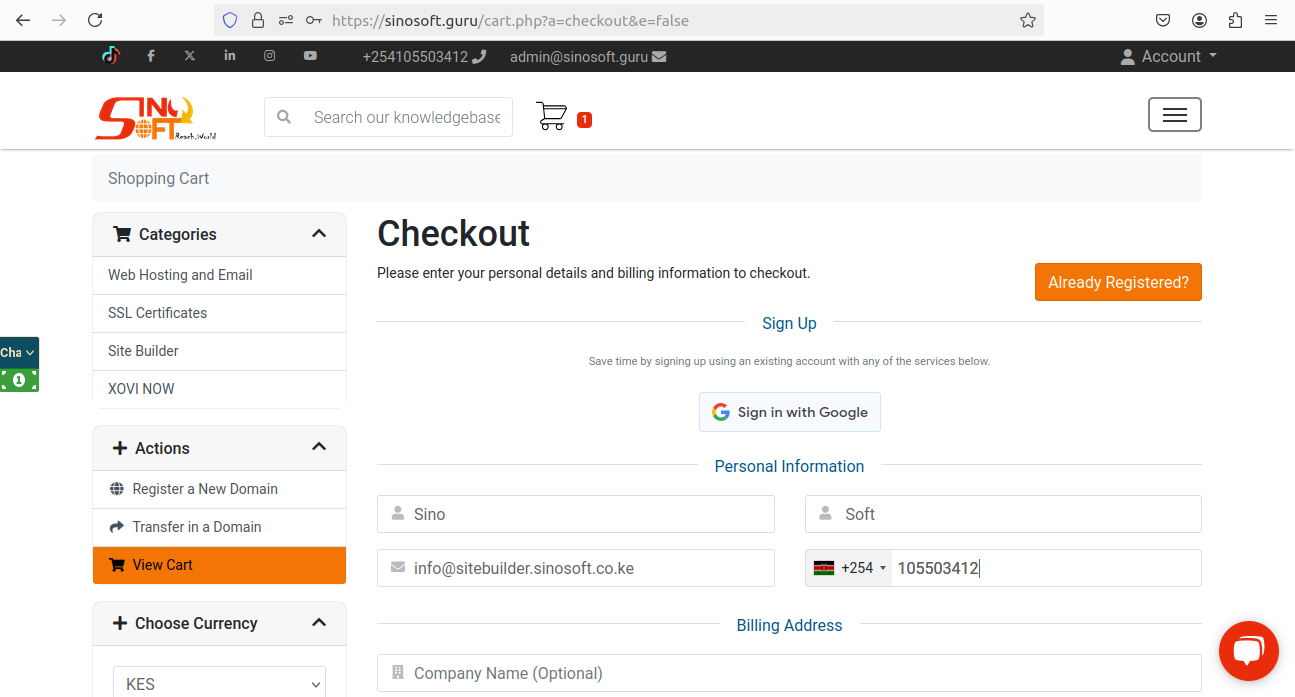
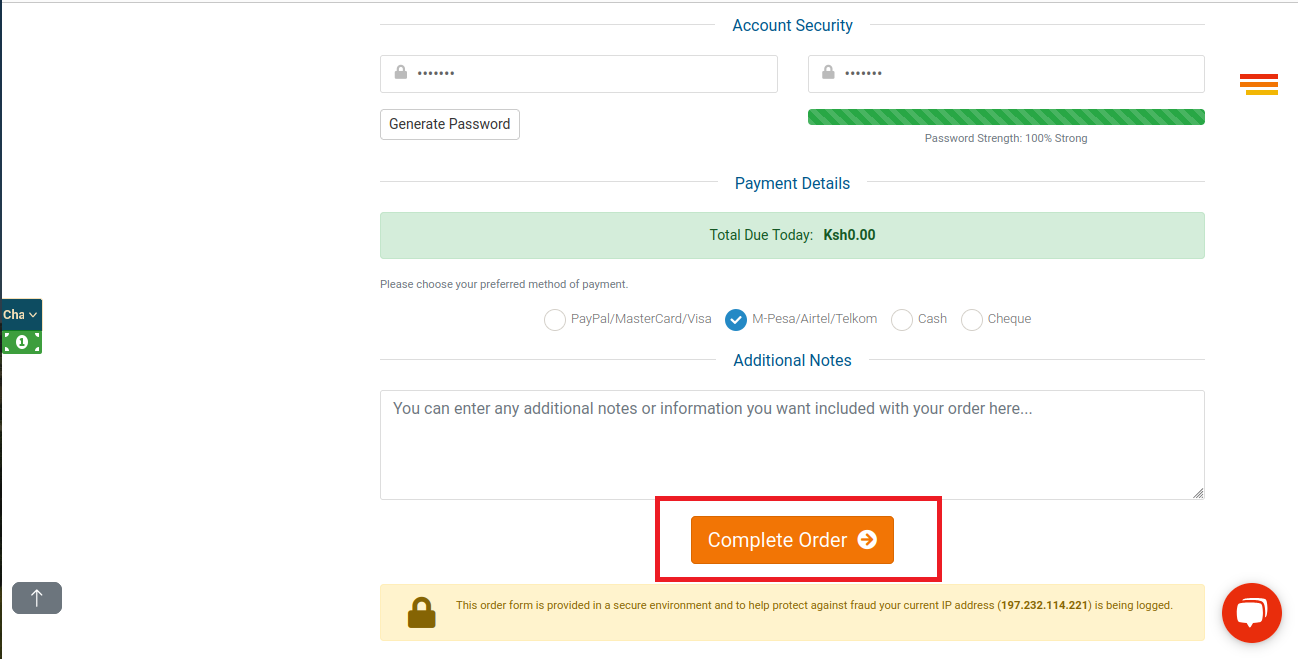
Step 4: Complete the Checkout Process
Now that your domain is validated, you will be redirected to the Checkout page. Here's what to do:
- Fill in all required fields with your personal details, including your name, contact information, and billing address.
- Ensure that you use a valid email address and set a password that you can easily remember. You will need these credentials in the next step.
- After filling in all the information correctly, click Complete Order to finalize the process.
Note: Double-check the details before submitting, especially your email and password, as these will be essential for accessing your account later.
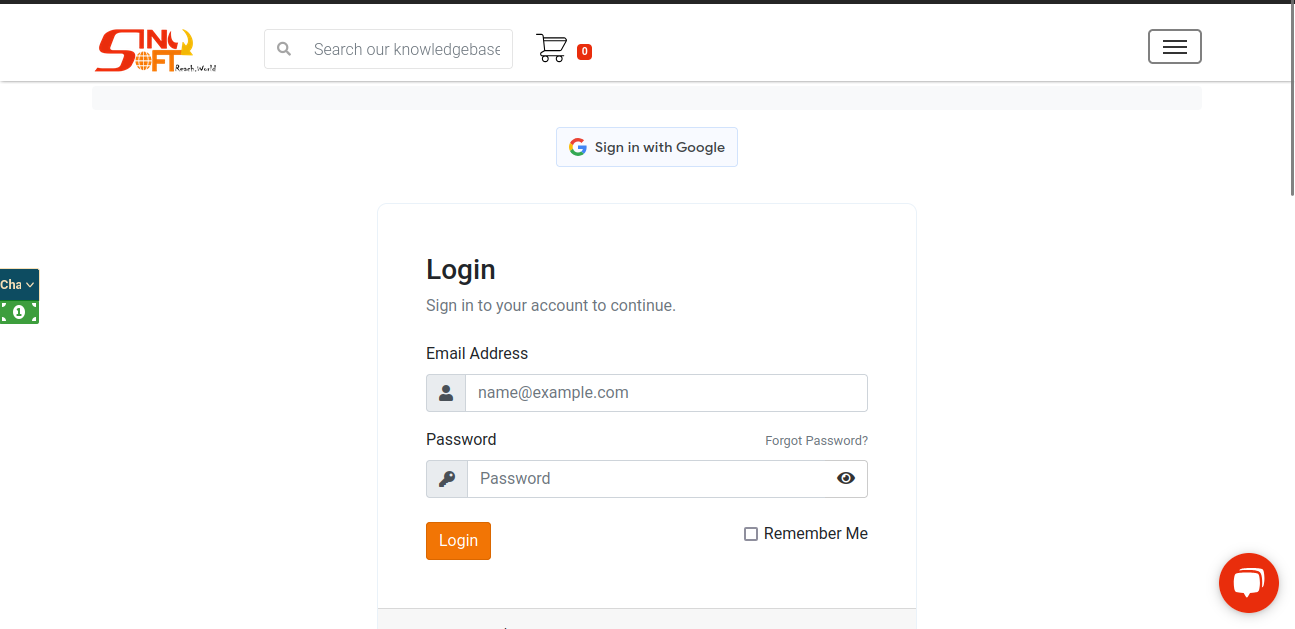
Step 5: Logging In to the Site Builder Dashboard
Once your order is complete, you can log in to the Site Builder Dashboard through your Client Area. Here's how:
- Go to the following link: https://sinosoft.guru/clientarea.
- On the login page, enter the Email address and password you used when making your domain order.
- Click Login to access your Site Builder Dashboard, where you are redirected to a client's page .
Step 6: Accessing the Site Builder from the Client Area
Once logged in to your WHMCS Client Area, follow these steps to access Site Builder:
- After logging in, you will see a box labelled Active for your Site Builder Free trial service.
- Click on View Details to open the service details page.
- From there, click Login to Site Builder to access the Site Builder interface.
- You will then be redirected to the Site Builder templates, where you can start selecting and customizing your website design.
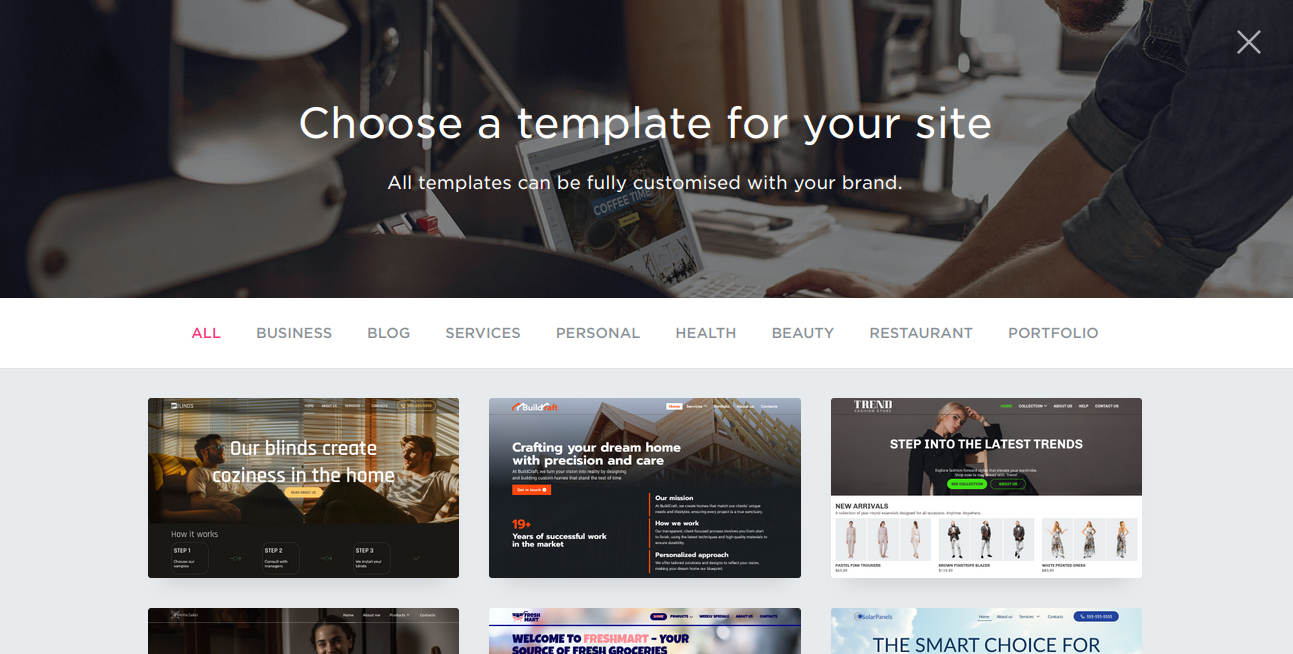
Step 7: Selecting a Site Builder Template
After being redirected to the Site Builder Templates page, you can choose from a variety of professionally designed templates to begin building your website. Here’s how to proceed:
- Browse through the templates to find one that aligns with your website's purpose and design needs.
- If you prefer a more hands-on approach, you can scroll to the bottom of the template gallery and select a blank template. This option allows you to build your website from scratch by dragging blocks and elements (such as images, text, and forms) from the library of ready-made items onto placeholders.
Choosing the Right Template
When selecting a template, keep these points in mind:
- Purpose: Ensure that the template suits the overall purpose and design theme of your website (e.g., e-commerce, portfolio, blog).
- Commitment: You cannot switch templates once you start building your site in the Site Editor, so choose carefully.
- Pre-built content: Each template (except the blank one) comes with a basic set of professionally designed pages, or at least one scrollable page, containing sample content such as text, images, forms, and videos, which you can easily replace with your own.
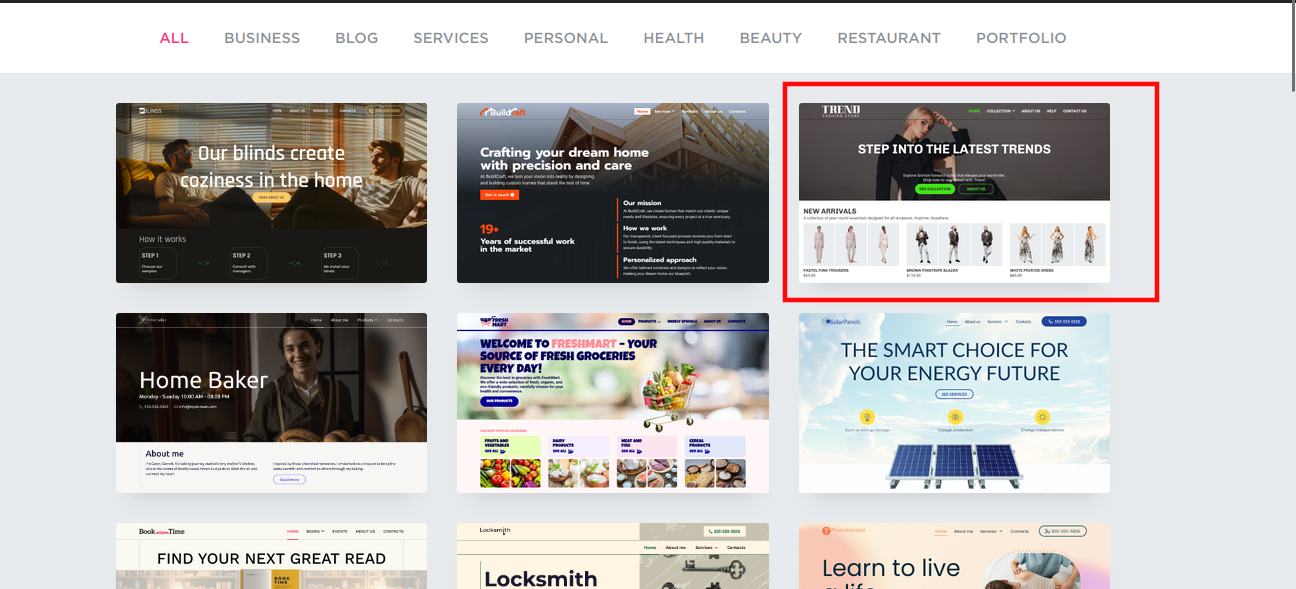
Step 8: Choosing the Fashion Template
For this guide, let’s choose the Fashion Template as an example. Here’s how to proceed:
- Scroll through the template gallery and locate the Fashion Template.
- Click on the Fashion Template to preview it. Review the design to ensure it fits the vision and purpose of your website.
Step 9: Finalizing Your Template Selection
Once you’re satisfied with the Fashion Template, follow these steps to proceed:
- Click on Select or Use this Template to continue.
- Most templates offer two versions: Multi-Page and Single-Page. Choose the version that best fits your needs:
- Multi-Page: Ideal for websites that require multiple pages (e.g., Home, About, Contact).
- Single-Page: Suitable for simpler websites that present all information on a single scrollable page.
 Once you’ve completed this step, you’ll be redirected to the Site Editor, where you can begin customizing the template’s content with your own text, images, buttons and other elements.
Step 10: Finally Publish Your Site
Once you’ve customized your site to your liking, it’s time to publish it:
- In the Site Editor, review all the changes and ensure that your content is complete and visually appealing.
-
When you’re ready to make your website live, look for the Publish button, typically located in the top-right corner of the editor. However, to make your website publicly accessible, you’ll need a Custom Domain , Hosting Package and a Site Builder package. These give you full privileges to publish your site beyond the free trial.
-
The Site Builder offers you the freedom to work on your designs until you create a website you’re truly satisfied with. However, it does come with limitations if you don’t purchase a package. Without upgrading, you may miss out on some of the more contemporary features. If you’re in search of free options that provide essential design capabilities, consider learning about Sino Soft Weebly. While its features may be less comprehensive than those of Site Builder, they come in a free package that allows you to access useful tools right out of the box.
Congratulations! Your website is now live and accessible to visitors. You can continue making updates and adjustments as needed.
You might also be interested:


